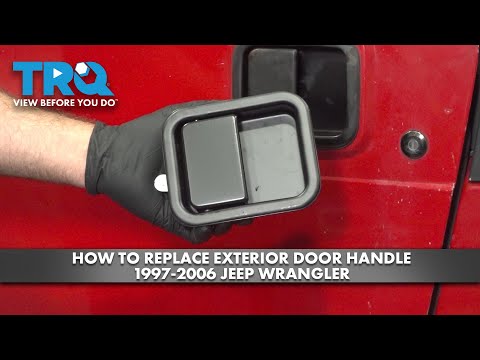
<p>Removing the exterior door handle on a Jeep Wrangler is a straightforward job on a stock vehicle. Add a suspension lift and larger tires, and the same task introduces new problems: the handle sits above chest height, the door swings with more momentum, and you end up working at awkward angles that encourage forcing parts instead of releasing them. The mistakes below account for most of the broken clips, bent linkage rods, and scratched paint that turn a one-hour job into a two-day repair.</p>
<h2>1. Ignoring How the Lift Changes Your Working Position</h2>
<p>A lifted Wrangler moves the door handle from chest height to eye level or higher. That shift changes how much leverage you have and how the door behaves when it opens.</p>
<ul>
<li>Reaching overhead encourages pulling trim panels toward you rather than prying them straight out, which snaps clips.</li>
<li>A door swinging open at height carries more momentum. A worn door check strap can let it swing into a jack stand, a workbench, or another vehicle.</li>
<li>Standing on a bumper, cooler, or tailgate is a common cause of falls and dented panels.</li>
</ul>
<p>Practical tips:</p>
<ul>
<li>Use a stable step stool or platform rated for your weight, placed on level ground.</li>
<li>Open the door only as far as the check strap allows, or disconnect the strap if you need full swing.</li>
<li>Roll the window down before starting. It lowers the door's center of gravity and gives you more clearance inside the cabin.</li>
</ul>
<h2>2. Prying the Door Panel and Handle Bezel With the Wrong Tools</h2>
<p>Jeep door panels are held by a mix of screws and plastic push clips that get brittle with age, heat, and cold.</p>
<ul>
<li>A flathead screwdriver concentrates force and cracks the panel or the bezel surrounding the handle.</li>
<li>Skipping hidden screws is the most common cause of a cracked panel: the armrest screw, the pull-cup screw, and the screw behind the interior handle bezel.</li>
<li>Cold weather makes clips snap. If the temperature is below 60°F, warm the interior first.</li>
</ul>
<p>Practical tips:</p>
<ul>
<li>Use a plastic trim pry tool or a dedicated clip removal tool, and start at the bottom edge of the panel.</li>
<li>Remove the bezel around the interior handle first, then the screws it hides.</li>
<li>Keep a magnetic tray or cup for fasteners. They disappear into the door cavity easily and rattle forever after.</li>
</ul>
<h2>3. Damaging the Linkage Rods and Plastic Retainers</h2>
<p>With the panel off, the exterior handle connects to the latch through metal rods held by small plastic clips, usually yellow or green.</p>
<ul>
<li>Pulling the handle out before releasing the rod clips bends the rods and breaks the retainers.</li>
<li>Forcing a rod out of its clip instead of releasing the locking tab breaks the clip every time.</li>
<li>Losing a retainer means the handle won't open the door reliably, and replacements are often dealer-only or junkyard finds.</li>
</ul>
<p>Practical tips:</p>
<ul>
<li>Photograph the routing of every rod before removing anything.</li>
<li>Release the clip's locking tab with a small pick, then lift the rod free.</li>
<li>Replace any cracked clip. Do not reuse it.</li>
<li>On power lock and power mirror doors, disconnect the electrical connector before pulling the handle out. Yanking the handle with the harness attached tears wires inside the door.</li>
</ul>
<h2>4. Reassembly Errors That Cause Rattles and Failed Handles</h2>
<p>Most handle problems show up after reassembly, not during removal.</p>
<ul>
<li>Overtightening the handle bolts, typically 10mm, cracks the plastic housing or distorts the bezel.</li>
<li>Reinstalling the vapor barrier with tape instead of butyl lets water into the door and rusts the linkage.</li>
<li>Skipping a function test before reinstalling the panel means doing the entire job twice.</li>
<li>Loose rods rattle against the door skin, and the source is hard to trace once the panel is back on.</li>
</ul>
<p>Practical tips:</p>
<ul>
<li>Snug the bolts. Do not crank them. Use the factory torque spec if you have it.</li>
<li>Cycle the exterior handle, the lock, and the interior latch several times before the panel goes back on.</li>
<li>Reseal the vapor barrier with butyl rope or fresh adhesive.</li>
<li>Align the top edge of the door panel first, then press the clips in by hand. Hitting the panel with your palm seats clips unevenly and cracks the mounting tabs.</li>
</ul>
<h2>Conclusion</h2>
<p>The lift itself isn't the problem. The problem is working at an angle that tempts you to force parts that are designed to release. Use a stable platform, warm the interior in cold weather, use plastic pry tools, and photograph the rod routing before you touch anything. Release clips instead of pulling them, replace any cracked retainer, and test the handle before the door panel goes back on. Those habits keep a simple handle swap from turning into a broken panel, a bent rod, or a door that won't open from the outside.</p>