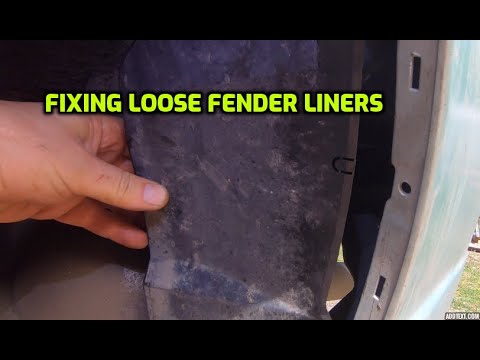
<p>Fender liners on fleet vans take a constant beating from road debris, gravel, curbs, and daily wear. While a scratched liner may seem cosmetic, ignoring the damage can lead to rust, corrosion, and costly replacement down the line. Repairing a scratched fender liner is a straightforward job that most fleet technicians can complete in under two hours with basic tools and materials. This guide covers the practical steps to restore a damaged liner and keep your fleet vans in service.</p>
<h2>What a Fender Liner Does and Why Scratches Matter</h2>
<p>The fender liner (also called a wheel well liner or splash shield) is the protective panel inside the wheel arch. It shields the engine bay, wiring, and body panels from water, mud, salt, and road debris.</p>
<p>Scratches matter because they:</p>
<ul>
<li>Expose bare plastic or metal to moisture, accelerating rust on metal liners</li>
<li>Weaken the liner's structure, causing cracks to spread</li>
<li>Allow water intrusion into sensitive components behind the wheel well</li>
<li>Lead to larger failures if left untreated</li>
</ul>
<p>Most fleet van liners are made of molded plastic (ABS or polypropylene), though some older models use stamped steel. The repair method depends on the material.</p>
<h2>Tools and Materials You'll Need</h2>
<p>Gather everything before starting to avoid downtime.</p>
<p><strong>For plastic liners:</strong></p>
<ul>
<li>Soapy water and a stiff brush</li>
<li>220-, 400-, and 600-grit sandpaper</li>
<li>Plastic bonding adhesive or epoxy</li>
<li>Plastic filler (flexible type)</li>
<li>Heat gun (for deep gouges)</li>
<li>Plastic primer and matching topcoat paint</li>
<li>Clear coat sealant</li>
</ul>
<p><strong>For metal liners:</strong></p>
<ul>
<li>Wire brush or sanding discs</li>
<li>Rust converter</li>
<li>Body filler and spot putty</li>
<li>Metal primer and topcoat paint</li>
<li>Undercoating spray</li>
</ul>
<p><strong>General tools:</strong></p>
<ul>
<li>Socket set and trim removal tools</li>
<li>Clean rags and degreaser</li>
<li>Painter's tape</li>
<li>Safety glasses and gloves</li>
</ul>
<h2>Step-by-Step Repair Process</h2>
<h3>1. Remove and Clean the Liner</h3>
<p>Jack up the van and remove the wheel for full access. Unbolt or unclip the liner using trim tools. Most liners attach with push clips, screws, or 8–10mm bolts.</p>
<p>Once removed, wash the liner with soapy water and a stiff brush. Remove all dirt, grease, and road salt. Let it dry completely before sanding. A clean surface is essential for adhesion.</p>
<h3>2. Assess and Prep the Damage</h3>
<p>Inspect the scratches under good light.</p>
<ul>
<li><strong>Light scratches:</strong> Scuff the surface with 400-grit sandpaper.</li>
<li><strong>Deep gouges:</strong> Sand with 220-grit, then feather the edges with 400-grit.</li>
<li><strong>Cracks or holes:</strong> Drill a small stop-hole at the end of the crack to prevent spreading, then sand the surrounding area.</li>
</ul>
<p>Wipe the area with degreaser to remove dust and oils.</p>
<h3>3. Repair the Scratches</h3>
<p><strong>Plastic liners:</strong></p>
<ul>
<li>Apply flexible plastic filler to deep gouges using a plastic spreader. Overfill slightly to allow for sanding.</li>
<li>For cracks, use plastic bonding epoxy or a two-part plastic welder. Some technicians reinforce the backside with fiberglass mesh.</li>
<li>For severe warping, heat the area gently with a heat gun and reshape it.</li>
<li>Let filler cure fully per the product instructions.</li>
</ul>
<p><strong>Metal liners:</strong></p>
<ul>
<li>Remove rust with a wire brush or sanding disc.</li>
<li>Apply rust converter to any pitted areas and let it dry.</li>
<li>Fill dents and deep scratches with body filler, then finish with spot putty.</li>
</ul>
<h3>4. Sand and Smooth</h3>
<p>Once cured, sand the repaired area:</p>
<ol>
<li>Start with 220-grit to level the filler.</li>
<li>Move to 400-grit for blending.</li>
<li>Finish with 600-grit for a smooth surface.</li>
</ol>
<p>For plastic, keep sanding flexible to avoid cracking. Wipe clean with a tack cloth.</p>
<h3>5. Prime, Paint, and Seal</h3>
<ul>
<li>Apply a primer suited to the liner material (plastic primer for ABS/poly, metal primer for steel).</li>
<li>Let it flash off, then apply two to three light coats of matching topcoat. Keep coats thin to prevent runs.</li>
<li>Finish with a clear coat or undercoating spray for extra protection against chips and moisture.</li>
</ul>
<p>Let the finish cure for at least 24 hours before reinstalling.</p>
<h3>6. Reinstall the Liner</h3>
<p>Reattach the liner using new clips or bolts where old hardware is worn. Tighten fasteners evenly to avoid stress cracks. Reinstall the wheel and torque lug nuts to the manufacturer's spec.</p>
<h2>Prevention Tips for Fleet Vans</h2>
<p>Fleet vans accumulate damage fast. Extend liner life with these habits:</p>
<ul>
<li>Install mud flaps behind all wheels to reduce debris impact.</li>
<li>Wash undercarriages regularly, especially in winter salt months.</li>
<li>Inspect liners during routine oil changes and tire rotations.</li>
<li>Replace missing clips immediately to prevent liners from sagging.</li>
<li>Apply a protective coating (undercoating or bedliner spray) to new liners before installation.</li>
<li>Train drivers to avoid curb strikes and deep potholes when possible.</li>
</ul>
<p>Track liner condition in your fleet maintenance log. Catching scratches early keeps small repairs from becoming full replacements.</p>
<h2>Conclusion</h2>
<p>Repairing a scratched fender liner on a fleet van is a manageable task that protects your vehicles from rust, water damage, and costly downtime. Clean the liner, prep the surface, fill and sand the damage, then prime, paint, and seal it before reinstalling. With the right materials and a bit of patience, you can restore a liner to near-original condition in a couple of hours. Pair repairs with preventive habits like mud flaps and regular inspections to keep your fleet on the road longer.</p>