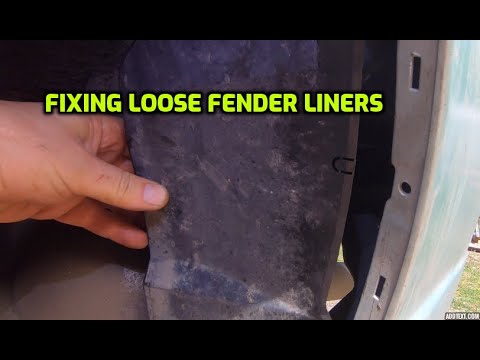
<p>Fender liners on a heavy duty towing rig take constant abuse from gravel, road debris, tire spray, and loading equipment. Scratches are common, especially on plastic or composite inner wheel well liners. Minor surface scuffs are cosmetic, but deep gouges can expose material to moisture, salt, and UV damage. Repairing a scratched fender liner is a practical DIY job when you match the repair method to the liner material and damage depth. This guide covers assessment, surface prep, repair options, and final protection.</p>
<h2>Assess the Damage and Identify the Liner Material</h2>
<p>Start with a thorough inspection before buying any repair products.</p>
<ul>
<li>Park the rig on a level surface, set the parking brake, and chock the wheels.</li>
<li>Use a bright LED light to check scratch depth, length, and location.</li>
<li>Look behind the liner for wiring, air lines, fuel tanks, or brake components before sanding or drilling.</li>
</ul>
<p>Classify the damage:</p>
<ul>
<li><strong>Surface scuff:</strong> Paint or texture is marred, but material is intact.</li>
<li><strong>Deep scratch or gouge:</strong> Material is removed; plastic may be fuzzy or metal may be bare.</li>
<li><strong>Crack or tear:</strong> Structural damage; repair may still work if limited to a small area.</li>
<li><strong>Broken mounting points or large missing sections:</strong> Replacement is usually faster and stronger.</li>
</ul>
<p>Identify the liner material:</p>
<ul>
<li><strong>Plastic:</strong> ABS, polypropylene (PP), TPO, or polyethylene. Check for a stamped code. PP and TPO need specialty adhesives or plastic welding.</li>
<li><strong>Composite/fiberglass:</strong> Uses resin and fiberglass mat for repair.</li>
<li><strong>Metal:</strong> Aluminum or steel. Scratches expose bare metal and can rust.</li>
</ul>
<p><strong>Practical tip:</strong> If the liner is flexible and oily to the touch, it is likely PP or TPO. Standard epoxy may not bond. Use a plastic welding kit or a manufacturer-approved adhesive.</p>
<h2>Clean and Prepare the Scratch</h2>
<p>Preparation determines whether the repair lasts.</p>
<ul>
<li>Wash the liner with mild soap and water to remove road grime, mud, and tar.</li>
<li>Remove oil and wax with isopropyl alcohol or a wax-and-grease remover.</li>
<li>For plastic, scuff the scratch and surrounding area with 320- to 400-grit sandpaper. Feather the edges.</li>
<li>For deep plastic gouges, start with 180- to 220-grit to remove loose material, then finish with 400-grit.</li>
<li>For metal, remove rust with a wire brush or sandpaper. Treat pitted rust with a rust converter.</li>
<li>Clean the area again after sanding. Let it dry completely.</li>
<li>Mask adjacent painted panels if you will use heat, primer, or paint.</li>
</ul>
<p><strong>Practical tips:</strong></p>
<ul>
<li>Do not use silicone-based dressings before repair; they prevent adhesion.</li>
<li>Use a plastic adhesion promoter on PP and TPO liners.</li>
<li>Work in a warm, dry area. Moisture and cold temperatures weaken adhesives and paint.</li>
</ul>
<h2>Repair the Scratch</h2>
<p>Choose the method based on material and damage.</p>
<h3>Plastic Liners</h3>
<ul>
<li><strong>Light scratches:</strong> Apply a flexible plastic filler or bumper repair epoxy. Spread it with a plastic squeegee, slightly above the surface.</li>
<li><strong>Deep gouges:</strong> V-groove the scratch with a rotary tool or utility knife. Plastic-weld using rods made of the same material. A plastic welder or soldering iron with a flat tip works.</li>
<li><strong>Cracks:</strong> Stop-drill a small hole at each end of the crack to prevent spreading. Weld the crack, then reinforce the backside with fiberglass mesh and flexible epoxy if space allows.</li>
<li><strong>Textured liners:</strong> After sanding, use a texture spray to match the original grain before painting.</li>
</ul>
<h3>Composite and Fiberglass Liners</h3>
<ul>
<li>Sand the area to bare composite.</li>
<li>Apply fiberglass resin and mat or cloth. Build in thin layers.</li>
<li>Let it cure, then sand smooth.</li>
<li>Finish with primer and a flexible topcoat.</li>
</ul>
<h3>Metal Liners</h3>
<ul>
<li>Sand the scratch to bare metal.</li>
<li>Apply self-etching primer to bare steel or aluminum.</li>
<li>For deep scratches, use body filler. For aluminum, use an aluminum-specific filler.</li>
<li>Sand smooth, then prime and paint.</li>
<li>For unpainted heavy-duty liners, rubberized undercoating or bedliner is a durable finish.</li>
</ul>
<p><strong>Practical tips:</strong></p>
<ul>
<li>Test adhesive or filler on a hidden area first.</li>
<li>Clamp or tape repair materials in place while curing.</li>
<li>Do not overheat plastic; it can warp or burn.</li>
<li>If the liner is cracked near a mounting hole, reinforce the backside with a metal or plastic patch.</li>
</ul>
<h2>Finish, Protect, and Reinstall</h2>
<p>The final finish protects the repair and blends it with the rest of the liner.</p>
<ul>
<li>Sand the repaired area with 400- to 600-grit wet sandpaper. For painted surfaces, progress to 800- to 1000-grit.</li>
<li>Clean with a prep spray or isopropyl alcohol.</li>
<li>For plastic, apply flexible bumper paint or trim paint. Use a clear coat designed for flexible surfaces.</li>
<li>For metal, apply primer, color coat, and clear coat. For work-truck liners, undercoating is acceptable.</li>
<li>Apply a protective layer of rubberized undercoating, bedliner, or plastic restorer. This hides minor scratches and guards against UV and road salt.</li>
<li>Reinstall the liner with new clips or fasteners if the old ones are corroded or loose.</li>
<li>Check tire clearance at full steering lock. Adjust or trim if the liner rubs.</li>
</ul>
<p><strong>Practical tips:</strong></p>
<ul>
<li>Use anti-seize on metal fasteners to prevent corrosion.</li>
<li>Do not over-tighten plastic clips; they crack easily.</li>
<li>Wash the liner regularly and inspect it after off-road towing or winter driving.</li>
<li>A ceramic coating or plastic sealant makes future mud and grime easier to rinse off.</li>
</ul>
<h2>Conclusion</h2>
<p>Repairing a scratched fender liner on a heavy duty towing rig is a manageable job that protects your investment. Assess the material and damage depth, clean and prep the surface, then use plastic welding, epoxy, fiberglass, or metal filler as needed. Finish with a durable protective coating and quality fasteners. A proper repair costs less than replacement, restores appearance, and keeps road debris away from critical underbody components.</p>