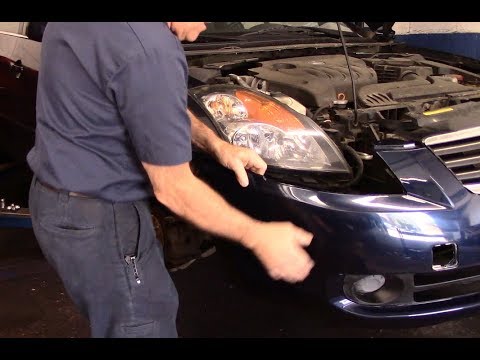
<p>Replacing the front bumper cover on a high-mileage vehicle is a practical repair that restores appearance and protects front-end components. While the process is similar to newer cars, high-mileage vehicles bring unique challenges: brittle plastic clips, rusted fasteners, and aftermarket parts that may not fit perfectly. This guide walks you through the job with realistic expectations and tips to avoid common pitfalls. With basic hand tools and a few hours, most DIYers can complete the swap.</p>
<h2>Prepare the Vehicle and Gather Tools</h2>
<p>Before removing anything, set yourself up for success. High-mileage vehicles often have hidden damage or corrosion behind the bumper, so preparation matters.</p>
<p><strong>Tools and materials:</strong></p>
<ul>
<li>Socket set (typically 10mm, 12mm, 14mm)</li>
<li>Phillips and flathead screwdrivers</li>
<li>Trim removal tools (plastic pry bars)</li>
<li>Ratchet with extensions</li>
<li>Penetrating oil (PB Blaster or similar)</li>
<li>Jack and jack stands or ramps</li>
<li>Replacement bumper cover (OEM or quality aftermarket)</li>
<li>New clips, retainers, and bolts</li>
<li>Touch-up paint or clear coat for exposed areas</li>
</ul>
<p><strong>Pre-work steps:</strong></p>
<ul>
<li>Park on a level surface and engage the parking brake.</li>
<li>Disconnect the negative battery terminal if your bumper has sensors or fog lights.</li>
<li>Spray penetrating oil on all visible bolts and clips, then wait 15–30 minutes.</li>
<li>Take photos at every stage before disassembly. High-mileage bumper mounts vary, and photos prevent guesswork during reassembly.</li>
</ul>
<h2>Remove the Old Bumper Cover</h2>
<p>The removal process follows a general pattern, but exact fastener locations differ by make and model. Work slowly and methodically.</p>
<p><strong>Typical removal sequence:</strong></p>
<ol>
<li><strong>Wheel well fasteners</strong> – Remove screws or push-pins connecting the bumper to the fender liners on both sides.</li>
<li><strong>Underbody bolts</strong> – Locate the row of bolts along the bottom edge and remove them.</li>
<li><strong>Grille and trim</strong> – Take out any screws holding the grille or upper trim that overlaps the bumper.</li>
<li><strong>Corner bolts</strong> – Remove the bolts at the bumper-to-fender junction on each side.</li>
<li><strong>Electrical connections</strong> – Disconnect fog lights, turn signals, and sensors before pulling the cover free.</li>
<li><strong>Release the cover</strong> – Gently pull the sides outward to release clips, then lift the cover away.</li>
</ol>
<p><strong>High-mileage tips:</strong></p>
<ul>
<li>Expect brittle clips. Have replacements on hand and pry evenly to avoid cracking mounting tabs.</li>
<li>If bolts snap, drill them out and use slightly larger hardware or rivnuts.</li>
<li>Rusted bumper support brackets may need replacement. Inspect and order them before reassembly.</li>
</ul>
<h2>Transfer Components and Test Fit the New Cover</h2>
<p>A new bumper cover is just a shell. You must move reusable parts from the old one and verify fitment before final installation.</p>
<p><strong>Parts to transfer:</strong></p>
<ul>
<li>Grille inserts and lower valance</li>
<li>Fog light housings and bulbs</li>
<li>Parking sensors and wiring harnesses</li>
<li>License plate bracket</li>
<li>Foam energy absorber (replace if crushed or deteriorating)</li>
</ul>
<p><strong>Test fit checklist:</strong></p>
<ul>
<li>Mount the new cover loosely with a few bolts at the corners.</li>
<li>Check gaps along the hood, fenders, and headlights.</li>
<li>Adjust positioning before tightening everything down.</li>
<li>Confirm all clip locations align. Aftermarket covers often need minor trimming or slot enlargement.</li>
</ul>
<p><strong>Practical tip:</strong> On high-mileage vehicles, the original foam absorber is often disintegrated. Replace it—it's inexpensive and absorbs impact energy, protecting the radiator support.</p>
<h2>Install the New Cover and Secure Everything</h2>
<p>With fitment confirmed, final installation is straightforward. Work from the center outward to keep gaps even.</p>
<p><strong>Installation steps:</strong></p>
<ol>
<li>Reconnect all electrical components and test lights and sensors.</li>
<li>Seat the cover onto the mounting brackets.</li>
<li>Install corner bolts finger-tight first.</li>
<li>Secure wheel well fasteners and underbody bolts.</li>
<li>Tighten all hardware in a cross pattern to avoid stress cracks.</li>
<li>Reinstall grille, trim, and any splash shields.</li>
</ol>
<p><strong>Final checks:</strong></p>
<ul>
<li>Verify panel gaps are consistent on both sides.</li>
<li>Check that the hood opens and closes without contacting the bumper.</li>
<li>Test all lights, fog lamps, and parking sensors.</li>
<li>Wash the vehicle and inspect for any loose fasteners.</li>
</ul>
<p><strong>High-mileage caution:</strong> Avoid overtightening bolts into plastic or rusty metal. Snug is enough. If a mounting point is compromised, reinforce it with a large washer or a small metal backing plate.</p>
<h2>Conclusion</h2>
<p>Replacing a front bumper cover on a high-mileage vehicle is a manageable DIY project that saves hundreds in labor costs. The key differences from newer cars are corrosion, brittle plastic, and worn support components—address these proactively, and the job goes smoothly. Take photos, replace worn clips and foam, test-fit before final tightening, and work patiently. With the right preparation, your high-mileage vehicle can look sharp and stay protected for years to come.</p>