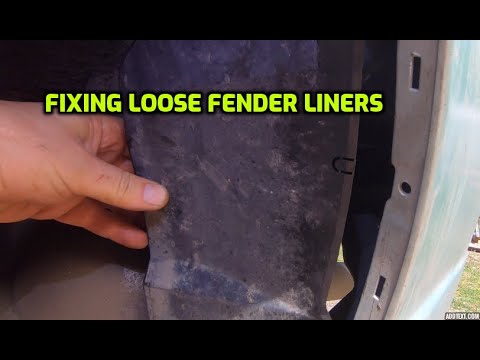
<p>Fender liners on classic muscle cars shield the inner fenders, wiring, brake lines, and fuel lines from road debris. After decades of service, they often seize in place. Rust, undercoating, hidden fasteners, and deformed plastic can all make removal difficult. Forcing the liner can crack original fiberglass, bend a fender lip, or damage brittle wiring. Troubleshooting the problem methodically saves time and preserves rare parts.</p>
<h2>Diagnose the Cause Before You Pry</h2>
<ul>
<li>Identify the liner material: ABS plastic, fiberglass, or metal. Each reacts differently to force and heat.</li>
<li>Locate every fastener. Classic cars often hide screws behind wheel arch trim, bumper brackets, and rocker moldings. Some use staples or rivets.</li>
<li>Check for rust jacking. Corrosion between the liner and fender can expand and lock the panel in place.</li>
<li>Look for undercoating, seam sealer, or butyl tape bonding the liner to the body.</li>
<li>Inspect for tire or suspension interference. A wider wheel or collapsed bushing can trap the liner.</li>
<li>Test movement with a plastic wedge. If the liner flexes but will not release, a hidden fastener or adhesive is holding it. If it feels solid, rust or deformation is likely.</li>
<li>Photograph everything before removal. Note shims, clips, and the routing of brake lines or wiring.</li>
<li>Check the wheel arch lip. On many 1960s and 1970s models, the liner tucks behind stainless or chrome trim. Removing the trim first can reveal hidden screws.</li>
<li>Inspect from inside the engine bay or trunk. Some fasteners are accessible only from the opposite side of the inner fender.</li>
<li>Look for aftermarket modifications. Alarm wiring, stereo cables, or brake upgrades may pass through the liner and act as a tether.</li>
</ul>
<h2>Remove Seized Fasteners Without Damaging Panels</h2>
<ul>
<li>Soak fasteners with penetrating oil for 24 hours. Reapply several times.</li>
<li>Use the correct driver. Classic muscle cars often use hex-head screws, Phillips, or 1/4-inch bolts. A worn bit will strip heads.</li>
<li>Tap the fastener head with a hammer and punch to break rust bonds.</li>
<li>Use an impact driver for stubborn screws. Apply steady pressure, not brute force.</li>
<li>For rusted bolts, turn clockwise slightly before loosening. This can crack corrosion.</li>
<li>If a screw strips, cut a slot with a hacksaw or use a screw extractor. Drill the head off only as a last resort.</li>
<li>For plastic push clips, release the center pin with a trim tool. Warm cold plastic with a heat gun on low.</li>
<li>Protect paint with masking tape and a heat shield if grinding or cutting.</li>
<li>Replace all damaged fasteners with stainless or OEM-style hardware. Apply anti-seize on metal threads.</li>
<li>Use a manual impact driver for Phillips screws. It converts hammer blows into torque and reduces cam-out.</li>
<li>For rusted nuts on studs, use a nut splitter if the stud is replaceable. If not, cut the nut with a Dremel and replace it.</li>
<li>Keep a magnet tray for hardware. Classic fasteners are often non-magnetic stainless or pot metal, so label them.</li>
</ul>
<h2>Break Adhesion from Rust, Undercoating, and Sealer</h2>
<ul>
<li>Scrape seams with a plastic scraper. Avoid metal tools that gouge original sheet metal.</li>
<li>Soften undercoating with mineral spirits, adhesive remover, or a heat gun on low. Work in a ventilated area.</li>
<li>Use thin wire or fishing line to saw through butyl tape or urethane sealer.</li>
<li>For rust-welded edges, apply penetrating oil and work the liner back and forth. Do not lever against a soft fender lip.</li>
<li>If the liner is deformed, warm it gently and reshape. Cold plastic cracks easily.</li>
<li>Fiberglass liners may crack at mounting holes. Repair or reinforce before removal if you plan to reuse it.</li>
<li>Metal splash shields with heavy rust may need to be cut away. Replacement panels are often available for popular models.</li>
<li>Use a putty knife with a rounded tip to separate seam sealer. Lubricate it with soapy water to reduce friction.</li>
<li>If the liner is bonded with urethane, use a urethane removal wire or a long blade. Do not pry at a single point; work along the seam.</li>
<li>For aluminum liners, avoid caustic cleaners. They can pit the metal and create new corrosion points.</li>
</ul>
<h2>Reinstall and Verify Clearance</h2>
<ul>
<li>Clean all mating surfaces. Remove loose rust, undercoating, and old sealer.</li>
<li>Treat bare metal with rust converter or primer. Paint to match if visible.</li>
<li>Apply new butyl or closed-cell foam tape where original. This prevents rattles and water intrusion.</li>
<li>Test-fit the liner before tightening. Check full steering lock, suspension compression, and tire clearance.</li>
<li>Trim minor interference points with a rotary tool. Add washers or spacers to move the liner away from tires.</li>
<li>Secure loose edges with rubber-lined P-clips or zip ties to factory holes. Do not rely on zip ties for structural mounting.</li>
<li>Check brake hoses, wiring, and fuel lines. They must not rub the liner.</li>
<li>Road test at low speed. Listen for rubbing over bumps and during turns. Recheck fasteners after 50 miles.</li>
<li>Apply a thin bead of non-hardening sealer around mounting holes to keep water out.</li>
<li>Use fender washers on small cracks to spread load. This can extend the life of a brittle plastic liner.</li>
<li>Check the liner at full droop and full compression. A suspension travel test with the wheel removed helps spot hidden contact.</li>
<li>If the tire still rubs, check wheel backspacing, tire size, and suspension alignment before cutting the liner.</li>
</ul>
<p>A stuck fender liner is usually a simple problem—hidden fasteners, rust, adhesive, or deformation—made difficult by age and fragile parts. Work slowly, use penetrating oil, correct tools, and controlled heat. Protect original panels, replace worn hardware, and verify clearance before driving. If the liner is brittle or rare, consider a reproduction piece to preserve the original. With methodical troubleshooting, you can free the liner without damaging your classic muscle car.</p>