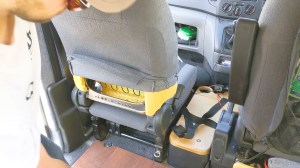
<p>The center console armrest in a Sprinter camper van endures constant abuse: elbows, drinks, phones, dogs, and the occasional person using it as a step. When the hinge snaps, the latch fails, or the padding collapses, you are left with a flapping lid, a rattling console, and an uncomfortable drive. The good news is that most armrest failures are repairable, and replacement parts are widely available. This guide walks through assessing the damage, temporary fixes, permanent repairs, and prevention.</p>
<h2>Assess the Damage and Identify the Cause</h2>
<p>Before buying parts or reaching for adhesive, determine exactly what failed. Armrest problems usually fall into a few categories:</p>
<ul>
<li><strong>Hinge failure</strong> – cracked or snapped plastic hinge pins, the most common issue.</li>
<li><strong>Latch failure</strong> – broken tabs or worn catches that no longer hold the lid closed.</li>
<li><strong>Mounting failure</strong> – screws or plastic bosses pulled out of the console body.</li>
<li><strong>Padding collapse</strong> – flattened foam and torn vinyl or leather.</li>
<li><strong>Cracked lid or console body</strong> – structural damage from weight or impact.</li>
</ul>
<p>Identify whether your console is factory Mercedes-Benz or an aftermarket unit installed during the camper conversion. Many conversions use custom consoles, and parts for those come from the converter, not the dealer. Note that some Sprinters also have seat-mounted armrests, which are separate components from the console lid.</p>
<p>Practical steps:</p>
<ul>
<li>Photograph everything before disassembly.</li>
<li>Store fasteners in labeled bags so they go back in the right holes.</li>
<li>Look for a part number stamped on the underside of the lid.</li>
<li>Use your VIN to confirm the correct OEM part, especially across T1N, NCV3, and VS30 generations.</li>
<li>Check for secondary damage, such as stripped screw holes or cracks spreading from the hinge.</li>
</ul>
<h2>Temporary Fixes That Keep You on the Road</h2>
<p>If you need the van drivable while waiting for parts, these short-term solutions work:</p>
<ul>
<li><strong>Zip ties</strong> through the hinge holes to restore basic pivoting.</li>
<li><strong>Heavy-duty hook-and-loop tape</strong> or double-sided tape to hold the lid shut.</li>
<li><strong>A bungee cord or strap</strong> over the console for a firm, removable hold.</li>
<li><strong>Remove the lid entirely</strong> if it interferes with the gear selector, handbrake, or your seating position.</li>
<li><strong>A folded towel or foam block</strong> under a collapsed lid to restore a usable surface.</li>
</ul>
<p>Keep temporary fixes light-duty. Do not lean your full weight on a zip-tied hinge or taped latch, and never let anything obstruct the controls.</p>
<h2>Permanent Repair Options</h2>
<p>Choose the repair based on the failure and your budget.</p>
<p><strong>DIY repair:</strong></p>
<ul>
<li><strong>Two-part plastic epoxy</strong> such as JB Weld Plastic Bonder or SEM 39747 for cracked lids and hinge mounts.</li>
<li><strong>Plastic welding</strong> with a soldering iron and matching filler rod for a stronger, fused repair.</li>
<li><strong>Reinforcement plates</strong> – aluminum or steel L-brackets, flat plates, or a piano hinge to spread load beyond the broken plastic.</li>
<li><strong>Through-bolting</strong> hinges with machine screws and nuts instead of relying on melted-in plastic bosses.</li>
<li><strong>3D-printed replacement parts</strong> – hinge pins, latch tabs, and brackets for popular Sprinter generations are widely available as files or finished parts.</li>
<li><strong>Reupholstery</strong> – an auto upholstery shop can replace collapsed foam and torn vinyl or leather for far less than a new assembly.</li>
</ul>
<p><strong>Replacement:</strong></p>
<ul>
<li><strong>OEM lid assembly</strong> from a Mercedes-Benz dealer or online parts retailer, matched by VIN.</li>
<li><strong>Aftermarket consoles and lids</strong> from van conversion suppliers, often more durable than factory plastic.</li>
<li><strong>Salvage yards</strong> – Sprinters are common in wrecking yards, and a used console can be inexpensive if you verify the generation and color match.</li>
<li><strong>Full console replacement</strong> when the body itself is cracked beyond reliable repair.</li>
</ul>
<p>Repair tips:</p>
<ul>
<li>Identify the plastic type before gluing. ABS bonds well with most adhesives; polypropylene requires heat welding or specialty products.</li>
<li>Clean all surfaces with isopropyl alcohol before applying adhesive.</li>
<li>Clamp repairs and let them cure a full 24 hours before use.</li>
<li>Use thread locker on hinge screws to prevent them from backing out again.</li>
</ul>
<h2>Upgrades and Prevention</h2>
<p>Once repaired, reduce the chance of a repeat failure:</p>
<ul>
<li>Add a reinforcement plate or metal hinge to spread stress across the lid.</li>
<li>Upgrade to a padded, leather-wrapped lid or an aftermarket armrest with a stronger frame.</li>
<li>Never sit, kneel, or stand on the armrest.</li>
<li>Check hinge and latch screws every few months and tighten as needed.</li>
<li>Lubricate hinge points with silicone spray to reduce binding.</li>
<li>Secure heavy items inside the console so they do not slam against the lid.</li>
<li>Consider a console cover to protect the upholstery from sun and wear.</li>
</ul>
<h2>Conclusion</h2>
<p>A broken center console armrest in a Sprinter camper van is a nuisance, not a crisis. Identify the failed component, apply a safe temporary fix if you need to drive, then choose between epoxy repair, reinforcement, 3D-printed parts, reupholstery, or full replacement. With a reinforced hinge and a bit of care, the repair will often outlast the original factory part.</p>