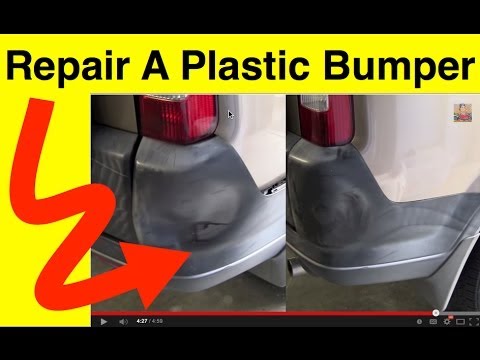
<p>A broken front bumper cover on a Class A RV is one of the most common body issues owners face. It usually happens from low-speed contact with a bollard, curb, tree branch, or parking barrier, and the damage often looks worse than it is. The bumper cover is typically a cosmetic fiberglass or plastic shell that sits over the actual structural bumper, so a crack or tear does not automatically mean the RV is unsafe to drive. What matters is knowing what is damaged underneath, how to secure the cover for travel, and whether to repair or replace it.</p>
<h2>Assess the Damage Before You Drive</h2>
<p>Turn on your hazard lights, park safely, and inspect the damage carefully before moving the RV.</p>
<ul>
<li><strong>Check what sits behind the cover.</strong> On a Class A, the front bumper area often houses headlights, fog lights, turn signals, wiring harnesses, air horns, tow bar connections, and sometimes radiator or charge air cooler ducting. Damage to these is more serious than a cracked shell.</li>
<li><strong>Look at the structural bumper.</strong> If the steel or aluminum bumper behind the cover is bent, cracked, or pushed back, get a professional inspection before driving. Structural damage can affect steering, cooling airflow, and alignment.</li>
<li><strong>Inspect fluid lines and coolers.</strong> A hard hit can crack a transmission cooler, radiator, or intercooler. Look for drips, hissing, or an overheated gauge on startup.</li>
<li><strong>Check the lights.</strong> Confirm headlights, turn signals, and markers still work. Broken or dangling lights are a legal and safety problem.</li>
<li><strong>Photograph everything.</strong> Take wide shots and close-ups from multiple angles. These photos are useful for insurance claims and repair estimates.</li>
<li><strong>Gather loose pieces.</strong> Pick up any broken fiberglass or trim so it does not become road debris.</li>
</ul>
<p>If the RV drives normally, holds temperature, and the lights work, you can usually move it. If anything feels off, call for a tow.</p>
<h2>Secure the Cover for Travel</h2>
<p>A flapping bumper cover can tear off completely, damage the towed vehicle, or hit another driver. Temporary repairs are acceptable to get you to a shop or campground.</p>
<ul>
<li><strong>Zip ties and drilled holes.</strong> Small holes drilled through the cover and into a solid mounting point make strong, cheap anchors.</li>
<li><strong>Self-tapping screws with washers.</strong> These work well for reattaching edges that have pulled loose from the body.</li>
<li><strong>Duct tape or aluminum foil tape.</strong> Use it for light cracks and to cover sharp edges, but do not rely on tape alone at highway speeds.</li>
<li><strong>Ratchet straps.</strong> For large sections that are separating, strap the cover to the frame or grille area. Pad contact points to protect paint.</li>
<li><strong>Remove it if necessary.</strong> If the cover is hanging and cannot be secured safely, take it off completely. Driving without a cover is legal in most areas as long as lights and plates are mounted and visible.</li>
<li><strong>Never block airflow.</strong> Do not tape over grille openings, radiator inlets, or cooling vents. Restricted airflow can cause overheating on a Class A diesel or gas chassis.</li>
</ul>
<p>Recheck your temporary fix at every fuel stop. Vibration loosens things quickly.</p>
<h2>Repair or Replace the Cover</h2>
<p>Once you are off the road, decide between repair and replacement.</p>
<p><strong>Repair is usually the better choice when:</strong></p>
<ul>
<li>The damage is limited to cracks, small holes, or separated seams.</li>
<li>The cover is fiberglass, which can be ground out, fiberglassed, filled, and repainted.</li>
<li>The cover is still available but expensive or on backorder.</li>
<li>You want to keep the original paint match.</li>
</ul>
<p><strong>Replacement makes more sense when:</strong></p>
<ul>
<li>Large sections are missing or shattered beyond practical repair.</li>
<li>The cover is a thin ABS or TPO plastic that has cracked through mounting points.</li>
<li>A used or aftermarket cover is cheaper than the labor to rebuild yours.</li>
</ul>
<p>Cost expectations vary widely:</p>
<ul>
<li>Fiberglass repair and repaint: often $500 to $2,500 depending on damage and paint work.</li>
<li>New aftermarket or used cover: $400 to $2,000 before paint.</li>
<li>OEM cover from the chassis or coach manufacturer: frequently $1,500 to $5,000 or more, plus freight and paint.</li>
<li>Full body shop repair with blending: $2,000 to $6,000.</li>
</ul>
<p>Paint matching matters on a Class A because the front cap often carries graphics and custom colors. A shop that handles RV bodywork will blend the repair into adjacent panels.</p>
<h2>Insurance and Professional Repair</h2>
<ul>
<li><strong>Check your coverage.</strong> Front bumper cover damage is typically covered under comprehensive if it came from an animal, debris, or vandalism, and under collision if you hit something. Liability alone will not cover your own RV.</li>
<li><strong>Weigh the deductible.</strong> If your deductible is $1,000 and the repair is $1,200, paying cash may avoid a rate increase and a claim on your record.</li>
<li><strong>Document the claim thoroughly.</strong> Photos, a written description, and a police or incident report if another party was involved will speed things up.</li>
<li><strong>Use an RV-specific shop.</strong> Auto body shops that only handle cars often struggle with the size, weight, and paint systems on a Class A. Mobile RV body repair services can also handle many bumper cover jobs at your site.</li>
<li><strong>Get two or three estimates.</strong> Prices for the same job can vary by thousands of dollars.</li>
<li><strong>Ask about lead times.</strong> Replacement covers for older coaches can take weeks to arrive. Plan around it.</li>
</ul>
<h2>Conclusion</h2>
<p>A broken front bumper cover on a Class A RV is rarely an emergency, but it does need attention. Inspect what is behind the cover, secure any loose sections before driving, and avoid blocking airflow to the radiator. Then decide between repair and replacement based on the extent of the damage and the cost of a new cover. Document everything, compare estimates, and use an RV-experienced shop. Handled this way, the repair stays manageable and your coach gets back on the road without unnecessary expense.</p>